18.10 自定义开机启动项的init脚本
大多数基于Linux的操作系统都使用了System-V风格的init进程管理,大量服务使用init脚本进行管理。init脚本是Linux系统用于启动系统服务的脚本,RedHat和CentOS发行版默认将这些服务启动脚本放在etcinit.d目录中。系统在启动时将根据当前的运行级(runlevel X)确定运行在etcrc.d/rcX.d目录下的脚本(都是到etcinit.d目录中的文件软链接)。
作为Linux系统管理人员,有时候需要根据具体的业务需求自己写init脚本。但是和一般的shell脚本不同,init脚本需要满足一定的格式,最基本的要求是,脚本必须接收至少两个参数:start和stop,分别用于启动和停止服务。系统在启动时所显示的很多的Starting其实是在调用脚本的start参数,如图18-3所示;系统在关机时显示的很多的Stopping则是在调用脚本的stop参数,如图18-4所示。当然,脚本可能由于功能的多样性,还可以接收更多参数。考虑到脚本良好的可读性,建议在写init脚本时,将各种参数的执行体封装成函数的格式。
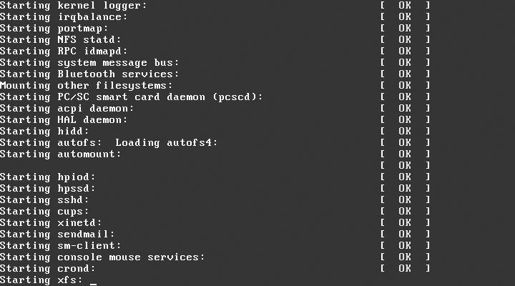
图18-3 开机过程中的服务启动项

图18-4 关机过程中的服务停止项
关于init脚本的书写要求,下面通过分析一个简单的系统脚本yum-updatesd来总结。在搞清楚并理解透彻后,自己写init脚本就可以变得很简单了。注意,下面脚本中以##开头的部分是给出的注解。
- [root@localhost ~]# cat etcinit.d/yum-updatesd
#!/bin/bash
##
简述一下该脚本的作用,建议有
# yum Update notification daemon
##
作者的联系方式,建议有
# Author: Jeremy Katz <katzj@redhat.com>
##
设置chkconfig
,一定要有。其中345
是运行级别为3
、4
、5
时,启动优先级是97
,关闭优先级是03
# chkconfig: 345 97 03
##
更详细的描述,建议要有
# description: This is a daemon which periodically checks for updates \
# and can send notifications via mail, dbus or syslog.
#
进程名,非必需
# processname: yum-updatesd
# config: etcyum/yum-updatesd.conf
# pidfile: varrun/yum-updatesd.pid
#
##
下面的信息不是必需的,可根据实际情况决定
### BEGIN INIT INFO
# Provides: yum-updatesd
# Required-Start: $syslog $local_fs messagebus
# Required-Stop: $syslog $local_fs messagebus
# Default-Start: 2 3 4 5
# Default-Stop: 0 1 6
# Short-Description: Update notification daemon
# Description: Daemon which notifies about available updates via mail, dbus or
# syslog. Can also be configured to automatically apply updates.
### END INIT INFO
##
引用库函数
# source function library
. etcrc.d/init.d/functions
RETVAL=0
##
定义start
函数的动作,一定要有
start() {
echo -n $"Starting yum-updatesd: "
daemon +19 'yum-updatesd &'
RETVAL=$?
echo
[ $RETVAL -eq 0 ] && touch varlock/subsys/yum-updatesd
}
##
定义stop
函数的动作,一定要有
stop() {
echo -n $"Stopping yum-updatesd: "
killproc yum-updatesd
echo
[ $RETVAL -eq 0 ] && rm -f varlock/subsys/yum-updatesd
}
##
定义restart
函数,不必需
restart() {
stop
start
}
##
脚本主体
case "$1" in
start)
start
;;
stop)
stop
;;
restart|force-reload|reload)
restart
;;
condrestart|try-restart)
[ -f varlock/subsys/yum-updatesd ] && restart
;;
status)
status yum-updatesd
RETVAL=$?
;;
*)
echo $"Usage: $0 {start|stop|status|restart|reload|force-reload|condrestart}"
exit 1
esac
exit $RETVAL
按照上面脚本的规范,将前一小节中的防火墙脚本改写成init脚本,如下所示:
- [root@localhost ~]# cat etcinit.d/myIptables
#!/bin/bash
#iptables Control myIptables
#Author: johnwang.wangjun@gmail.com
#chkconfig: 345 97 03
#description: This script is for start and stop myIptables
#pidfile: varrun/myIptables.pid
#DEFINE VARIABLES
HTTP_PORT=80
SECURE_HTTP_PORT=443
SSH_PORT=22
DNS_PORT=53
ALLOWED_IP=192.168.61.1 #
这是笔者实验环境中主机的地址,读者需要修改成自己的IP
IPTABLES=/sbin/iptables
RM=/bin/rm
PIDFILE=varrun/myIptables.pid
start() {
if [ -f $PIDFILE ]; then
echo "myIptables is running"
exit 1
else
touch $PIDFILE
fi
#FLUSH IPTABLES
$IPTABLES -F
$IPTABLES -X
#DEFINE DEFAULT ACTION
$IPTABLES -P INPUT DROP
$IPTABLES -P OUTPUT DROP
#DEFINE INPUT CHAINS
$IPTABLES -A INPUT -p icmp --icmp-type any -j ACCEPT
$IPTABLES -A INPUT -s localhost -d localhost -j ACCEPT
$IPTABLES -A INPUT -m state --state ESTABLISHED,RELATED -j ACCEPT
$IPTABLES -A INPUT -p tcp --dport $SSH_PORT -j ACCEPT
#DEFINE OUTPUT CHAINS
$IPTABLES -A OUTPUT -p icmp --icmp any -j ACCEPT
$IPTABLES -A OUTPUT -s localhost -d localhost -j ACCEPT
$IPTABLES -A OUTPUT -m state --state ESTABLISHED,RELATED -j ACCEPT
$IPTABLES -A OUTPUT -p tcp -m state --state NEW --dport $HTTP_PORT -j ACCEPT
$IPTABLES -A OUTPUT -p tcp --dport $SECURE_HTTP_PORT -j ACCEPT
$IPTABLES -A OUTPUT -p udp --dport $DNS_PORT -j ACCEPT
$IPTABLES -A OUTPUT -p tcp --dport $SSH_PORT -j ACCEPT
echo "Start myIptables OK"
}
stop() {
if [ ! -f $PIDFILE ]; then
echo "myIptables is already stopped"
exit 1
else
$RM $PIDFILE
fi
#FLUSH IPTABLES
$IPTABLES -F
$IPTABLES -X
#DEFINE DEFAULT ACTION
$IPTABLES -P INPUT ACCEPT
$IPTABLES -P OUTPUT ACCEPT
echo "Stop myIptables OK"
}
case "$1" in
start)
start
;;
stop)
stop
;;
reload|restart)
stop
start
;;
*)
echo "Usage: $0 {start|stop|restart|reload}"
exit 1
esac
注意,该脚本应该放在etcinit.d目录中,并且要有可执行权限。
编写完成后,使用chkconfig命令添加该脚本成为系统服务。注意:如果系统本身启动了iptables服务,可以将该启动项停用。
#
停用系统默认iptables
服务
[root@localhost ~]# chkconfig —level 345 iptables off
#
添加myIptables
为系统服务
[root@localhost ~]# chkconfig —add myIptables
#
使用chkconfig
添加为系统服务后,看到默认345
是开启的,这和脚本中的设置是一致的
[root@localhost ~]# chkconfig —list | grep myIptables
myIptables 0:off 1:off 2:off 3:on 4:on 5:on 6:off
#
启动优先级确实是97
[root@localhost ~]# ls etcrc.d/rc3.d/ | grep myIptables
S97myIptables
#
关闭优先级确实是3
[root@localhost ~]# ls etcrc.d/rc2.d/ | grep myIptables
K03myIptables
添加完成后,就可以使用service命令来管理该服务了。
- [root@localhost ~]# service myIptables start
Start myIptables OK
[root@localhost ~]# service myIptables restart
Stop myIptables OK
Start myIptables OK
[root@localhost ~]# service myIptables stop
Stop myIptables OK
