32.3.7 用PDFlib生成证书
在这个项目中,为了使用PDFlib,我们需要做一些折中。虽然精确复制前面用到的证书是肯定可以的,但仍需要努力地手动生成及定位每一个元素,而不能使用像Microsoft Word这样的工具来协助编排文档。
我们使用与前面相同的文本,包括红色的圆花饰及位图签名,但我们不打算复制复杂的边界。该脚本的完整代码如程序清单32-6所示。
程序清单32-6 pdflib.php——用PDFlib生成证书
<?php
//create short variable names
$name=$_POST['name'];
$score=$_POST['score'];
if(!$name||!$score){
echo"<h1>Error:</h1>
<p>This page was called incorrectly</p>";
}else{
$date=date('F d,Y');
//create a pdf document in memory
$pdf=pdf_new();
pdf_open_file($pdf,"");
//set up name of font for later use
$fontname='Times-Roman';
//set up the page size in points and create page
//US letter is 11"x 8.5"and there are approximately
//72 points per inch
$width=11*72;
$height=8.5*72;
pdf_begin_page($pdf,$width,$height);
//draw our borders
$inset=20;//space between border and page edge
$border=10;//width of main border line
$inner=2;//gap within the border
//draw outer border
pdf_rect($pdf,$inset-$inner,
$inset-$inner,
$width-2*($inset-$inner),
$height-2*($inset-$inner));
pdf_stroke($pdf);
//draw main border$border points wide
pdf_setlinewidth($pdf,$border);
pdf_rect($pdf,$inset+$border/2,
$inset+$border/2,
$width-2*($inset+$border/2),
$height-2*($inset+$border/2));
pdf_stroke($pdf);
pdf_setlinewidth($pdf,1.0);
//draw inner border
pdf_rect($pdf,$inset+$border+$inner,
$inset+$border+$inner,
$width-2*($inset+$border+$inner),
$height-2*($inset+$border+$inner));
pdf_stroke($pdf);
//add heading
$font=pdf_findfont($pdf,$fontname,'host',0);
if($font){
pdf_setfont($pdf,$font,48);
}
$startx=($width-pdf_stringwidth($pdf,'PHP Certification',
$font,'12'))/2;
pdf_show_xy($pdf,'PHP Certification',$startx,490);
//add text
$font=pdf_findfont($pdf,$fontname,'host',0);
if($font){
pdf_setfont($pdf,$font,26);
}
$startx=70;
pdf_show_xy($pdf,'This is to certify that:',$startx,430);
pdf_show_xy($pdf,strtoupper($name),$startx+90,391);
$font=pdf_findfont($pdf,$fontname,'host',0);
if($font)
pdf_setfont($pdf,$font,20);
pdf_show_xy($pdf,'has demonstrated that they are certifiable'.
'by passing a rigorous exam',$startx,340);
pdf_show_xy($pdf,'consisting of three multiple choice questions.',
$startx,310);
pdf_show_xy($pdf,"$name obtained a score of$score".'%.',$startx,260);
pdf_show_xy($pdf,'The test was set and overseen by the',$startx,210);
pdf_show_xy($pdf,'Fictional Institute of PHP Certification',
$startx,180);
pdf_show_xy($pdf,"on$date.",$startx,150);
pdf_show_xy($pdf,'Authorised by:',$startx,100);
//add bitmap signature image
$signature=pdf_load_image($pdf,'png','/Program Files/Apache Software
Foundation/Apache2.2/htdocs/phpmysql4e/chapter32/signature.png','');
pdf_fit_image($pdf,$signature,200,75,'');
pdf_close_image($pdf,$signature);
//set up colors for rosette
pdf_setcolor($pdf,'both','cmyk',43/255,49/255,1/255,67/255);//dark
blue
pdf_setcolor($pdf,'both','cmyk',1/255,1/255,1/255,1/255);//black
//draw ribbon 1
pdf_moveto($pdf,630,150);
pdf_lineto($pdf,610,55);
pdf_lineto($pdf,632,69);
pdf_lineto($pdf,646,49);
pdf_lineto($pdf,666,150);
pdf_closepath($pdf);
pdf_fill($pdf);
//outline ribbon 1
pdf_moveto($pdf,630,150);
pdf_lineto($pdf,610,55);
pdf_lineto($pdf,632,69);
pdf_lineto($pdf,646,49);
pdf_lineto($pdf,666,150);
pdf_closepath($pdf);
pdf_stroke($pdf);
//draw ribbon 2
pdf_moveto($pdf,660,150);
pdf_lineto($pdf,680,49);
pdf_lineto($pdf,695,69);
pdf_lineto($pdf,716,55);
pdf_lineto($pdf,696,150);
pdf_closepath($pdf);
pdf_fill($pdf);
//outline ribbon 2
pdf_moveto($pdf,660,150);
pdf_lineto($pdf,680,49);
pdf_lineto($pdf,695,69);
pdf_lineto($pdf,716,55);
pdf_lineto($pdf,696,150);
pdf_closepath($pdf);
pdf_stroke($pdf);
pdf_setcolor($pdf,'both','cmyk',1/255,81/255,81/255,20/255);//red
//draw rosette
draw_star(665,175,32,57,10,$pdf,true);
//outline rosette
draw_star(665,175,32,57,10,$pdf,false);
//finish up the page and prepare to output
pdf_end_page($pdf);
pdf_close($pdf);
$data=pdf_get_buffer($pdf);
//generate the headers to help a browser choose the correct application
header('Content-type:application/pdf');
header('Content-disposition:inline;filename=test.pdf');
header('Content-length:'.strlen($data));
//output PDF
echo$data;
}
function draw_star($centerx,$centery,$points,$radius,
$point_size,$pdf,$filled){
$inner_radius=$radius-$point_size;
for($i=0;$i<=$points*2;$i++){
$angle=($i2pi())/($points*2);
if($i%2){
$x=$radius*cos($angle)+$centerx;
$y=$radius*sin($angle)+$centery;
}else{
$x=$inner_radius*cos($angle)+$centerx;
$y=$inner_radius*sin($angle)+$centery;
}
if($i==0){
pdf_moveto($pdf,$x,$y);
}else if($i==$points*2){
pdf_closepath($pdf);
}else{
pdf_lineto($pdf,$x,$y);
}
}
if($filled){
pdf_fill_stroke($pdf);
}else{
pdf_stroke($pdf);
}
}
?>
使用以上脚本生成的证书如图32-7所示。可以看到,它与其他证书非常相似,只是边界简单一些,星状图案看起来稍有不同。这是因为我们这里是将它绘制到文档中的,而不是使用一个已存在的剪切美术文件。
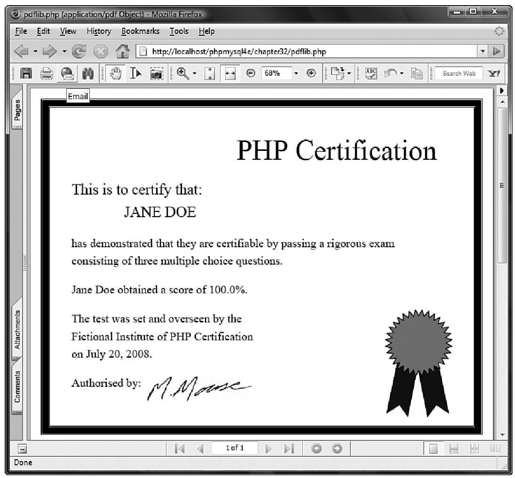
图 32-7 pdflib.php将证书画到一个PDF文档中
现在,我们介绍一下该脚本与前面的例子不同的部分。
由于访问者需要在证书中获得关于自己的资料,因此我们将在内存中创建该文档而不是在文件中。如果将它写入一个文件,需要考虑能够生成唯一文件名的机制,并且能够防止人们偷偷进入其他人的证书,以及选择一种删除旧文件以释放服务器上硬盘空间的机制。
为了在内存中创建一个文档,我们在调用了pdf_open_file()函数后再调用不带参数的pdf_new()函数。如下所示:
$pdf=pdf_new();
pdf_open_file($pdf,"");
简化的边界将包含3个条纹:一条粗边框和两条细边框,其中一个在主边框里面,另一个在外面。我们将以矩形方式绘制它们。
为了以这种方法确定边界的位置以便轻易调整页面的大小或边界的外观,我们把所有边界位置建立在已有的变量$width和$height,以及新变量$inset、$border和$inner的基础上。用$inset指定位于页面边缘的边界有多少点宽,$border来指定主边框的厚度,以及使用$inner来指定主边框与两条细边框之间的缝隙有多宽。
如果我们使用过其他的图形API来绘制图形,在使用PDFlib绘制图形时,就不会有太多的惊讶。第22章对于这项工作是有帮助的,因为用gd库绘制图形与用PDFlib绘制图形非常相似。
细边框是比较简单的。为了创建一个长方形,可以使用pdf_rect()函数。该函数要求提供如下参数:PDF文档标识符、长方形的左下角的X和Y坐标以及宽和高。因为我们希望排列能够灵活些,因此用已设置的变量来计算这些:
pdf_rect($pdf,$inset-$inner,
$inset-$inner,
$width-2*($inset-$inner),
$height-2*($inset-$inner));
对pdf_rect()数的调用可以设置一块长方形的区域。为了绘制出这个形状,需要调用pdf_stroke()函数。如下所示:
pdf_stroke($pdf);
为了绘制主边框,需要指定线宽。在默认的情况下,线宽为1个点。如下代码中,对pdf_setlinewidth()函数的调用将它设为$border(在这个例子中,设置为10)点:
pdf_setlinewidth($pdf,$border);
在设置好宽度后,我们再次调用pdf_rect()函数来创建一个矩形并调用pdf_stroke()函数将它绘制出来:
pdf_rect($pdf,$inset+$border/2,
$inset+$border/2,
$width-2*($inset+$border/2),
$height-2*($inset+$border/2));
pdf_stroke($pdf);
在绘制好一条宽线后,我们必须记住用如下所示代码将宽度重新设置为1:
pdf_setlinewidth($pdf,1.0);
我们使用pdf_show_xy()函数来定位证书中每一行文本的位置。对于大多数文本行,我们使用可配置的左边距($startx)作为X坐标。如果想要将标题置于页面的中央,那么需要知道它的宽度来确定左面的位置。我们可以使用pdf_stringwidth()函数来得到其宽度。如下所示的函数调用:
pdf_stringwidth($pdf,'PHP Certification',$font,'12')
将以当前的字体与大小返回字符串"PHP Certification"的宽度。
对于其他版本的证书,需要嵌入一个扫描后的位图签名。如下所示的3个语句:
$signature=pdf_load_image($pdf,'png','/Program Files/Apache Software
Foundation/Apache2.2/htdocs/phpmysql4e/chapter32/signature.png','');
pdf_fit_image($pdf,$signature,200,75,'');
pdf_close_image($pdf,$signature);
将打开一个包含签名的GIF文件,将图像添加到页面的指定位置并关闭该GIF文件。我们也可以使用其他类型的文件。
提示 当通过pdf_load_image()函数载入一个图像时,使用该文件的完整路径。在这个例子中,signature.png的完整路径是Windows系统的路径。
使用PDFlib添加到证书中的元素最困难的是那个圆饰物。我们不能自动地打开已有的包含该圆饰物的Windows meta文件,但可以任意绘制任何想要的图形。
为了绘制一个填充的图形,例如其中一个锯齿,我们编写了如下所示的代码。在这里,条纹和直线的颜色都设为黑色,填充或内部颜色设为暗蓝色:
pdf_setcolor($pdf,'fill','rgb',0,0,.4,0);//dark blue
pdf_setcolor($pdf,'stroke','rgb',0,0,0,0);//black
这里,我们建立了一个五边形作为其中一个锯齿并填充它:
pdf_moveto($pdf,630,150);
pdf_lineto($pdf,610,55);
pdf_lineto($pdf,632,69);
pdf_lineto($pdf,646,49);
pdf_lineto($pdf,666,150);
pdf_closepath($pdf);
pdf_fill($pdf);
就像多边形的轮廓一样,我们需要用相同的方法再一次设置,但是这次是调用pdf_stroke()函数而不是pdf_fill()函数。
由于多点星形是一种复杂形状,我们编写了一个函数来计算该形状沿途路径的位置。该函数叫做draw_star(),它要求中点的X和Y坐标、角点的数目、半径、角点的长度、PDF文件标识符和一个布尔值来表示该星形应填充还是仅绘制其轮廓。
draw_star()函数用到了一些基本的三角学来计算形成一颗星的一系列点的位置。对于星形具有的每个点,我们在星形的半径上找出一个点,在外圆周的更小的圆$point_size上再找出一个点,并在它们之间画一条直线。一个值得注意的地方是PHP的三角函数如cos()和sin()是以弧度而不是以度为单位的。
利用一个函数和一些数学知识,我们可以精确地生成一个复杂的重复性图形。如果希望以复杂的模式画页面边界,也可以使用相似的方法。
当产生了所有页面元素后,需要关闭该页面及文档。
