第7章 数据控件绑定与操作
本章要介绍的数据控件与HTML服务器控件和Web标准服务器控件一样,它们也是Web Forms编程模型的基本元素。与这两类控件相比,它们具有更多内置功能和可编程性,可以满足页面各种数据的展示需求。不仅可以采用在代码中以声明的方式提供数据的形式来绑定它们,而且还可以通过编程的方式从数据源或者List<Type>中获取数据的形式来绑定它们。同时,它们也提供了统一的编程接口,让你可以在它的基础之上自由扩展成自己所需要的控件。
7.1 List数据控件
List数据控件是最常用的数据控件,它包括DropDownList、RadioButtonList、ListBox、CheckBoxList和BulletedList控件。其中:
❑BulletedList:显示列表项,列表项可以为文本、链接按钮或超链接;
❑CheckBoxList:显示复选框列表;
❑DropDownList:显示下拉框列表;
❑ListBox:显示列表框;
❑RadioButtonList:显示单选按钮列表。
这些控件都继承自ListControl类,但不能直接创建ListControl抽象类的实例。相反,此类由其他类(如DropDownList、RadioButtonList、ListBox、CheckBoxList与BulletedList类)继承以提供通用的基本功能。
ListControl类的属性允许你指定用来填充列表控件的数据源,使用DataSource属性指定要绑定到列表控件的数据源。如果数据源包含多个表,请使用DataMember属性指定要使用的表。通过分别设置DataTextField和DataValueField属性,可以将数据源中的不同字段绑定到列表控件项的ListItem.Text和ListItem.Value属性。通过设置DataTextFormatString属性,可以设定列表控件中每一项的显示文本的格式。
List数据控件中显示的所有项都保存在Items集合中。可以使用SelectedIndex属性,以编程方式指定或确定列表控件中选定项的索引。使用SelectedItem属性,可以访问选定项的属性。
除此之外,ListControl类提供了SelectedIndexChanged事件,在信息发往服务器之前,如果列表控件中的选定项发生变化,会引发该事件。这使你可以为此事件提供自定义处理程序。
7.1.1 List数据控件的共有属性与方法
上面已经阐述过,所有的List数据控件都继承自ListControl基类。因此,这些List数据控件都存在一些共有的属性与方法。
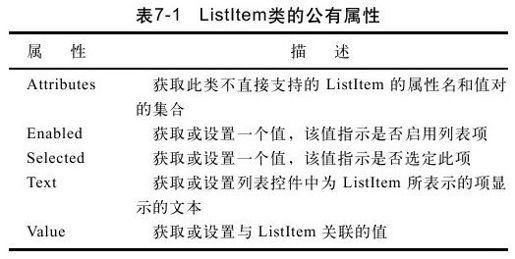
1)每个控件都有一个选项列表,每个选项都是ListItem类的一个实例。其中,ListItem类具有一些公有属性,如表7-1所示。
使用示例如下面的代码所示:
<asp:DropDownList runat="server">
<asp:ListItem Enabled="true"Selected="True"
Text="男"Value="0"></asp:ListItem>
<asp:ListItem Enabled="true"Selected="false"
Text="女"Value="1"></asp:ListItem>
</asp:DropDownList>
<asp:CheckBoxList ID="CheckBoxList1"runat="server">
<asp:ListItem Enabled="true"Selected="True"
Text="男"Value="0"></asp:ListItem>
<asp:ListItem Enabled="true"Selected="false"
Text="女"Value="1"></asp:ListItem>
</asp:CheckBoxList>
2)都可以绑定数据源,支持声明式绑定和编程式绑定。其中,编程式绑定不仅可以绑定ListItem对象集合,还可以绑定DataTable中的Columns,绑定List<Type>对象。下面的示例演示了如何使用List<Type>对象来绑定List数据控件。
<asp:DropDownList runat="server"ID="sexDropDownList"
DataTextField="Value"DataValueField="Id">
</asp:DropDownList>
<asp:CheckBoxList ID="sexCheckBoxList"runat="server"
DataTextField="Value"DataValueField="Id">
</asp:CheckBoxList>
在页面声明好控件之后,就可以直接在后台代码里将List<Type>对象通过控件的DataSource属性和DataBind()方法绑定到控件上显示出来。绑定示例如下面的代码所示:
public class ListData
{
private int_id;
private string_value;
public int Id
{
get{return_id;}
}
public string Value
{
get{return_value;}
}
public ListData(int id, string value)
{
_id=id;
_value=value;
}
}
public partial class DropDownListTest:System.Web.UI.Page
{
protected void Page_Load(object sender, EventArgs e)
{
if(!IsPostBack)
{
List<ListData>list=new List<ListData>();
list.Add(new ListData(0,"男"));
list.Add(new ListData(1,"女"));
list.Add(new ListData(2,"无"));
sexDropDownList.DataSource=list;
sexDropDownList.DataBind();
sexCheckBoxList.DataSource=list;
sexCheckBoxList.DataBind();
}
}
}
3)除BulletedList控件以外,它们都以相同的方式确定被选中的项,通过SelectedIndex、SelectedItem、SelectedValue属性获取和设置被选中的项。其中:
❑SelectedIndex:获取或设置列表中选定项的最低序号索引;
❑SelectedItem:获取列表控件中索引最小的选定项;
❑SelectedValue:获取列表控件中选定项的值,或选择列表控件中包含指定值的项。
4)默认情况下,当使用DataBind()方法绑定到数据源时,List控件原有的数据会被清空,新的选项会被加入进来。如果设定AppendDataBoundItems的属性为true,就可以在绑定数据源时保留已经存在的数据项。
5)都有AutoPostBack属性和ClientIDMode属性。
6)都有获得列表项((LstItem)的集合的Items属性。所有List控件呈现的列表项都包含在ListControl控件的Items属性中。该属性返回的是一个ListItemCollection对象。可以直接访问这个集合中的列表项,增加或删除指定列表项或者改变列表项的顺序。示例如下所示:
ListItem item=sexDropDownList.SelectedItem;
if(item!=null)
{
sexDropDownList.Items.Remove(item);
//清除列表选择并将所有项的Selected属性设置为false
sexDropDownList.ClearSelection();
sexDropDownList.Items.Add(item);
}
7.1.2 DropDownList控件
使用DropDownList控件可以创建只允许从中选择一项的下拉列表控件。还可以通过设置它的样式属性,如BorderColor、BorderStyle和BorderWidth等属性来控制DropDownList控件的显示外观,如下所示:
<asp:DropDownList runat="server"ID="nameDropDownList"
Width="150px"BackColor="Blue"
Font-Bold="True"ForeColor="#FF6600">
</asp:DropDownList>
声明好DropDownList控件之后,就可以绑定数据。可以将DataTable或DataSet赋给DropDownList控件的DataSource属性,同时还需要指明DropDownList控件的DataTextField和DataValueField属性的值。最后调用DataBind()方法执行数据绑定与显示。绑定示例如下面的代码所示:
//从数据库中获取绑定的数据
nameDropDownList.DataSource=
DbHelper.Instance.CreateDataTable(CommandType.Text,
"select employeeid, employeename from employee");
//指定DropDownList的DataTextField
nameDropDownList.DataTextField="employeename";
//指定DropDownList的DataValueField
nameDropDownList.DataValueField="employeeid";
//将数据绑定到DropDownList进行显示
nameDropDownList.DataBind();
当然,也可以在后台代码使用ListItem对象来添加数据项,如下面的示例代码所示:
//声明一个ListItem对象
ListItem item=new ListItem("新添加的姓名","10");
//将该ListItem对象设置为选中
item.Selected=true;
//将该ListItem对象添加到nameDropDownList中
nameDropDownList.Items.Add(item);
除此之外,DropDownList控件还有一个非常重要的处理事件,即SelectedIndexChanged事件。当用户选择一数据项时,DropDownList控件将引发一个SelectedIndexChanged事件。默认情况下,此事件不会导致将页发送到服务器,但可以通过将AutoPostBack属性设置为true来使此控件强制立即发送。
要使用这两个事件,首先得在DropDownList控件中声明它们,并且还需要将DropDownList控件的AutoPostBack属性设置为true,如下面的代码所示:
<asp:DropDownList runat="server"
ID="nameDropDownList"
onselectedindexchanged=
"nameDropDownList_SelectedIndexChanged"
Width="150px"AutoPostBack="true"
BackColor="Blue"Font-Bold="True"
ForeColor="#FF6600">
</asp:DropDownList>
这样,就可以在后台代码里对SelectedIndexChanged事件做如下处理:
protected void nameDropDownList_SelectedIndexChanged(object
sender, EventArgs e)
{
Label1.Text="employeeid:"
+nameDropDownList.SelectedValue
+"——employeename:"
+nameDropDownList.SelectedItem;
}
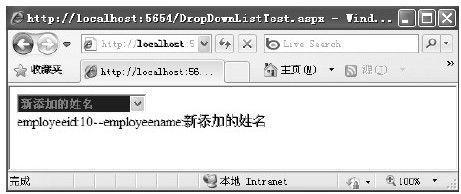
示例运行结果如图7-1所示。
如图7-1所示,只要选中DropDownList控件中的数据项,就会触发protected void nameDrop DownList_SelectedIndex Changed(object sender, EventArgs e)事件,从而显示出相应的选择结果。
图 7-1 DropDownList示例运行结果
其实,在日常开发中,SelectedIndex Changed事件用得最多的是处理多个Drop DownList控件的联动选择效果。如下面的示例声明了两个DropDownList控件,要求选择姓名((nmeDropDownList)数据项后,在工资((slaryDropDownList)控件里显示相应的工资情况。
姓名:<asp:DropDownList runat="server"
ID="nameDropDownList"
OnSelectedIndexChanged=
"nameDropDownList_SelectedIndexChanged"
Width="150px"AutoPostBack="true"BackColor="Blue"
Font-Bold="True"ForeColor="#FF6600">
</asp:DropDownList>
工资:<asp:DropDownList runat="server"ID="salaryDropDownList"
Width="150px"BackColor="Blue"
Font-Bold="True"ForeColor="#FF6600">
</asp:DropDownList>
这种联动选择效果的处理方法并不复杂,首先需要给相关的DropDownList控件绑定好数据。然后在父DropDownList控件(这里是nameDropDownList)的SelectedIndexChanged事件里处理需要联动显示的子DropDownList控件(这里是salaryDropDownList),如下面的代码所示:
public partial class DropDownListTest:System.Web.UI.Page
{
protected void Page_Load(object sender, EventArgs e)
{
if(!IsPostBack)
{
nameDropDownList.DataSource=
DbHelper.Instance.CreateDataTable(CommandType.Text,
"select employeeid, employeename from employee");
nameDropDownList.DataTextField="employeename";
nameDropDownList.DataValueField="employeeid";
nameDropDownList.DataBind();
}
}
private void BindsalaryDropDownList()
{
salaryDropDownList.DataSource=
DbHelper.Instance.CreateDataTable(CommandType.Text,
"select salaryid, salary from salary where employeeid="
+Convert.ToInt32((nmeDropDownList.SelectedValue));
salaryDropDownList.DataTextField="salary";
salaryDropDownList.DataValueField="salaryid";
salaryDropDownList.DataBind();
}
protected void nameDropDownList_SelectedIndexChanged(
object sender, EventArgs e)
{
this.salaryDropDownList.Items.Clear();
BindsalaryDropDownList();
}
}
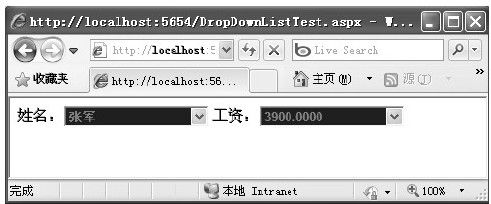
示例运行效果如图7-2所示。
图 7-2 联动选择示例运行效果
7.1.3 RadioButtonList与CheckBoxList控件
关于RadioButtonList与CheckBoxList控件,在第3章中已经详细介绍。其中,CheckBoxList控件可以在Web页面上创建多选复选框,而RadioButtonList控件轻松地创建单项选择的单选按钮组。
下面的示例演示了如何将DataTable绑定到RadioButtonList与CheckBoxList控件中:
public partial class RadioButtonListTest:System.Web.UI.Page
{
protected void Page_Load(object sender, EventArgs e)
{
if(!IsPostBack)
{
//绑定CheckBoxList1
CheckBoxList1.DataSource=GetEmployee();
CheckBoxList1.DataTextField="employeename";
CheckBoxList1.DataValueField="employeeid";
CheckBoxList1.DataBind();
//绑定RadioButtonList1
RadioButtonList1.DataSource=GetEmployee();
RadioButtonList1.DataTextField="employeename";
RadioButtonList1.DataValueField="employeeid";
RadioButtonList1.DataBind();
}
}
private DataTable GetEmployee()
{
return DbHelper.Instance.CreateDataTable(
CommandType.Text,
"select employeeid, employeename from employee");
}
}
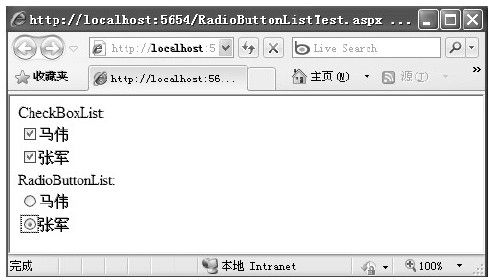
示例运行效果如图7-3所示。
图 7-3 RadioButtonList与CheckBoxList控件示例运行效果
7.1.4 ListBox控件
ListBox控件允许用户从预定义的列表中选择一个或多个项。它与DropDownList控件的不同之处在于,它不但可以一次显示多个项,而且(可选)还允许用户选择多个项。可以通过设置它的SelectionMode属性来指定单选((Sngle)还是多选((Mltiple),默认值为Single;还可以通过Rows属性来指定列表控件里要显示的行数,默认为4行。如果该控件包含的项数比设置的项数多,则会显示一个垂直滚动条。如下面的示例所示:
<asp:ListBox ID="ListBox1"runat="server"
SelectionMode="Multiple"Rows="10"
Width="100px"Height="50px">
</asp:ListBox>
与其他List数据控件一样,可以使用同样的方法来绑定它,如下面的代码所示:
public partial class ListBoxTest:System.Web.UI.Page
{
protected void Page_Load(object sender, EventArgs e)
{
if(!IsPostBack)
{
ListBox1.DataSource=GetEmployee();
ListBox1.DataTextField="employeename";
ListBox1.DataValueField="employeeid";
ListBox1.DataBind();
}
}
private DataTable GetEmployee()
{
return DbHelper.Instance.CreateDataTable(
CommandType.Text,
"select employeeid, employeename from employee");
}
}
还可以通过枚举Items集合并测试每个ListItem元素的Selected值来确定ListBox控件中的选定项。如下面的代码所示:
foreach(ListItem li in ListBox1.Items)
{
if(li.Selected==true)
{
Label1.Text+=li.Text;
}
}
当然,也可以使用Items集合来设置多重选择ListBox控件中的所选内容。如下面的代码所示:
foreach(ListItem li in ListBox1.Items)
{
li.Selected=true;
}
与DropDownList控件一样,当用户选择某一数据项时,ListBox控件同样会引发一个名为SelectedIndexChanged的事件,但必须将它的AutoPostBack属性设置为true。示例如下面的代码所示:
protected void ListBox1_SelectedIndexChanged(object sender,
EventArgs e)
{
Label1.Text+=ListBox1.SelectedItem.Text;
}
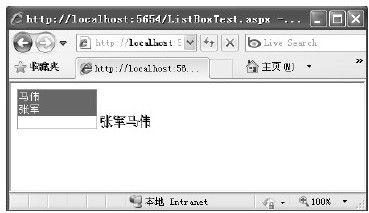
示例运行结果如图7-4所示。
图 7-4 ListBox控件示例运行效果
7.1.5 BulletedList控件
BulletedList控件可以创建一个无序或有序(编号)的项列表,它们分别呈现为HTML<UL>或<OL>标记。可以指定项、项目符号或编号的外观,可以静态定义列表项或通过将控件绑定到数据来定义列表项,也可以在用户单击项时做出响应。
其中,BulletedList控件可呈现项目符号或编号,具体取决于BulletStyle属性的设置,如表7-2所示。
如表7-2所示,如果将控件设置为呈现项目符号,可以选择与HTML标准项目符号样式匹配的预定义项目符号样式字段(如Disc、Circle和Square字段表示的内容);如果将控件设置为呈现编号,可以选择HTML标准编号选项(如LowerAlpha、UpperAlpha、LowerRoman和UpperRoman字段),并且通过设置FirstBulletNumber属性,还可以为序列指定一个起始编号;如果将控件设置为自定义图像,可以将BulletStyle属性设置为CustomImage的值,以指定项目符号的自定义图像,同时还必须设置BulletImageUrl属性以指定图像文件的位置。
值得注意的是,如果使用FirstBulletNumber属性来指定排序BulletedList控件中开始列表项编号的值,如果BulletStyle属性设置为Disc、Square、Circle或CustomImage字段,则忽略分配给FirstBulletNumber属性的值。如下面的示例代码所示:
<asp:BulletedList ID="ItemsBulletedList"BulletStyle="Numbered"
DisplayMode="LinkButton"FirstBulletNumber="2"runat="server">
<asp:ListItem Value="http://www.baidu.com">
Baidu
</asp:ListItem>
<asp:ListItem Value="http://www.google.com">
</asp:ListItem>
<asp:ListItem Value="http://www.comesns.com">
Comesns
</asp:ListItem>
</asp:BulletedList>
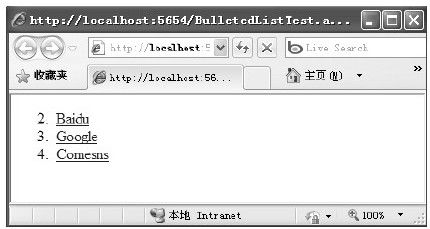
在代码中,将BulletStyle设置成Numbered(数字),并将FirstBulletNumber属性设置为2,即表示从2开始进行编号列表的值。运行结果如图7-5所示。
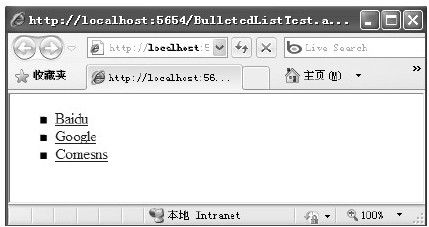
现在如果将BulletStyle="Numbered"修改成为BulletStyle="Square",这时BulletedList控件将忽略FirstBulletNumber="2"。如下面的代码所示:
<asp:BulletedList ID="ItemsBulletedList"BulletStyle="Square"
DisplayMode="LinkButton"FirstBulletNumber="2"runat="server">
<asp:ListItem Value="http://www.baidu.com">
Baidu
</asp:ListItem>
<asp:ListItem Value="http://www.google.com">
</asp:ListItem>
<asp:ListItem Value="http://www.comesns.com">
Comesns
</asp:ListItem>
</asp:BulletedList>
示例运行效果如图7-6所示。
图 7-5 BulletStyle="Numbered"与FirstBulletNumber="2"的运行效果
图 7-6 BulletStyle="Square"与FirstBulletNumber="2"运行效果
若要指定BulletedList控件中列表项的显示行为,可以将DisplayMode属性设置为下列枚举值之一:
1)Text。它将控件的列表项呈现为一个简单的静态文本。
2)H yperLink。它将控件的列表项呈现一个超链接,用户可以单击此链接转到其他页。因此,必须提供一个目标URL作为单个项的Value属性。单击超链接时,将定位到相应的URL。还可以使用Target属性指定框架或窗口,单击超链接时,将在该框架或窗口显示定位到的网页。
3)LinkButton。它将控件的列表项呈现一个链接按钮,单击这些链接按钮将回发到服务器。若要以编程方式控制单击链接按钮时执行的操作,请为Click事件提供事件处理程序。
值得注意的是,虽然SelectedIndex和SelectedItem属性是从ListControl类继承而来的,但它们不适用于BulletedList控件。可以使用BulletedListEventArgs类的事件数据来确定单击的BulletedList中的链接按钮的索引。如下面的代码所示:
protected void ItemsBulletedList_Click(object sender,
BulletedListEventArgs e)
{
ListItem li=ItemsBulletedList.Items[e.Index];
Label1.Text=li.Text+"——"+li.Value;
}
与其他列表控件一样,BulletedList控件也支持数据绑定。若要将BulletedList绑定到数据源,可以使用提供的任意数据绑定机制。绑定示例如下面的代码所示:
public partial class BulletedListTest:System.Web.UI.Page
{
protected void Page_Load(object sender, EventArgs e)
{
if(!IsPostBack)
{
ItemsBulletedList.DataSource=GetEmployee();
ItemsBulletedList.DataTextField="employeename";
ItemsBulletedList.DataValueField="employeeid";
ItemsBulletedList.DataBind();
}
}
private DataTable GetEmployee()
{
return DbHelper.Instance.CreateDataTable(
CommandType.Text,
"select employeeid, employeename from employee");
}
}
